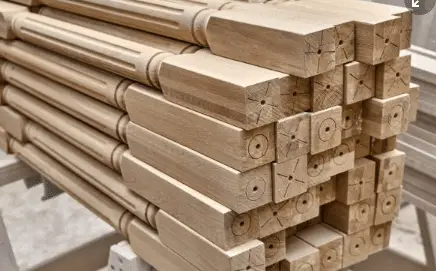
Knowing how to turn table legs on a lathe is a delightful thing. It is unusually difficult to make identical items of another item. However, it is possible.
When it comes to spindle turning, it even becomes harder trying to make everything look the same.
But today, relax because you are going to learn how to turn table legs on a wood lathe easily. With the easy and trusted steps I am going to show you today, you are going to become perfect in that act.
I understand that turning four legs of a table to match exactly may sound hard. But hard is not impossible. So, no matter how hard it may sound, just know that it is still possible.
When you follow the tips and procedure I will lay down for you today, then you can successfully turn table legs on a wood lathe.
Eventually, you can also use the same techniques when trying to copy a broken chair spindle or producing a set of balusters.
Looking for perfection when trying to make parts that match can be boring. In addition to that, it can as well be a tedious task to perform. So, do not be obsessed about making the exact copy, rather, you can settle for a near-perfect item.
You can as well settle for similarity. Why? If you settle for similarity, all you need is to get the layout right, then get the diameter and shape very close to the original.
However, as the duplicated pieces start getting further apart, the diameters and shapes look identical to the eyes.
In addition, slight variations add warmth and a human element that machine-made parts lack.
Table of Contents
Tips On How To Turn Table Legs On A Lathe
Firstly, learn to trust your eyes. You must trust your eyes when you want to turn table legs on a wood lathe. If you don’t do this, you will not succeed.
This is because you will not ever believe that you have done a perfect job. Then, After making the first leg to your satisfaction, place it immediately behind the next blank on the lathe.
Secondly, you must learn to look at the upper horizons of the prototype leg and blank and not the wood itself. This allows you to see exactly what you want to duplicate. Without this, you may lose focus of what you are trying to duplicate.

Thirdly, try to make at least one prototype before you start working on the four legs. Don’t do that because you have a perfect drawing, then you will just start working.
No, it is a different thing to move from two-dimensional to three dimensions.
Lastly, when you are making the prototype leg, remember to often remove it from the lathe. When you do this, try to view it in an upright position.
Doing this helps you to view just the same way it will be viewed mounted on the table.
Turned Furniture Legs
Turned furniture legs and feet make a piece of furniture spin through the room. A turned leg or foot is created by rotating a wood dowel on a lathe.
Magnificent nodules, swellings, and disks are shaped and chiseled into the wood. A nodule is a round structure created in the wood.
Contrast is made by swellings which are large forms created in the wood. Disk-like shapes are used to create flat or thin designs in the wood.
Wood to turn
Looking for wood to turn may not be easy. You’ll need four pieces of 3-1/2 in. by 3-1/2 in.by 30-in. squared stock that is cut exactly to the same length.
Tools and supplies
You will need the following tools when you want to turn table legs on a wood lathe. They include:
A spur or modified dead center (highly recommended if you are a novice turner) for the headstock side, and a live center for the tailstock side.
An outside caliper, at least 4-in. capacity. (I keep several pairs sized and labeled for the different diameters. For a project of this kind even three pairs would suffice to speed the process along.)
A double-posted 24-in. tool rest. (This is optional, but very convenient if you plan to do longer spindle work regularly. This rest also requires an additional tool: rest base or banjo.)
Turning tools: a roughing gouge (any size); a 1/2-in.detailing gouge ground to a fingernail shape; a 1/2 in. or larger skew chisel; and a parting tool (any size).
A square and a pencil.
Layout board materials: 6 in. wide by 28 in. long 3/4-in. poplar, 1-in. brads or finish nails, a hammer, and a nipper.
Sandpaper; four sheets each of the following grits: 100, 120, 150,180, and 220
Steps To Turn Table Legs On A Wood Lathe
Follow the steps below if you truly desire to know how to turn table legs on a wood lathe. These steps make it easy and simple for you.
Step 1: Make Story Stick
The first step to follow when you want to turn table legs on a wood lathe is to make a story stick. The story stick becomes both a road map and a guide for you. You just need a road map for all of the lengths and diameters needed to create the leg.
In another way, you trace the shape of the table leg onto a material: cardboard, hardboard, or plywood. You must be that the design is parallel to the edges of your story stick.
You can use a square to draw lines from the feature across the stick when you have done this.
Once you have traced the lines, you can as well take a square on the flat edge of your board. You will also mark a line upwards where each valley and peak is seen on the template.
Thereafter, you are going to use a hacksaw to cut the edge of the lines. This will create a groove for your pencil to rest on while transferring the lines to the blank space.
Finally, you can mark all 4 sides of your blanks. While doing this, you have to be careful to make sure you don’t cut above the lines. Put your blank between centers and use a roughing gouge to get your blank round.
Step 2: Prepare Stock For Legs
Once you have gotten the stock to the desired width and thickness, you are sure that the legs are all the same length.
The next thing is to mark all the centers of each. After that, set the drive into one end.
Then you can mount the piece on a wood lathe. When you have done this, bring the story stick up to the stock and transfer the marks.
Step 3: Cut The Remaining Features
After marking all the transition lines with material, then, the time to measurement has reached. You must measure the diameter of each feature.
To get the correct measurement, you can use a pair of calipers in measuring the diameters.
Also once the feature is close to size, you will as well use the pair calipers to check the diameter again.
Any time you turn the lathe, you must check the diameter of a feature especially if you are new to turning.
You will repeat this process for the different feature diameters until all the legs are turned.
Step 4: Complete Set Of Legs
After everything, you are sure to get your table legs turned on a wood lathe. It is quite a simple technique but, you must follow the instructions to get it done well.
Table Legs That Can Be Turned On A Wood Lathe
There are numerous furniture styles that you can turn to a wood lathe. They include:

- ball
- ball and ring slat back or ladder
- ball, ring and vase
- baluster
- bamboo
- block and vase ring
- bulb and ring
- cup and cover
- ring
- spiral
- spool
- steeple
- trumpet
- vase and block, and
- vase and ring cylinder.
Frequently Asked Questions
What size lathe do you need to turn table legs?
If you want to turn your table leg to a wood lathe, you will need a lathe with 36 inches between the centers to turn most table legs.
How do you attach legs to a tabletop?
To attach legs to a tabletop, you can use metal plates also known as surface plates. Screw them into the table.


